#directx 12
Explore tagged Tumblr posts
Text
I really wanna play marvel rivals with a friend but it refuses to work.
It took me forever to preload because of my slow wifi and then when I finally tried launching it, I got hit with "DirectX 12 is not supported on your system. Try running without the -dx12 or -d3d12 command line argument." Then after editing the launch options in the properties in Steam to try -d3d12 then -dx12 I kept getting the same error. Finally I tried -dx11 and got "Unable to launch with RHI 'DirectX 11' since the project is not configured to support it." I ran dxdiag and my system does support DirectX 12. I also made sure Windows was updated to the latest version and my graphics drivers didn't need updating. I also verified the integrity of the game files. I think it's either my system not meeting the requirements, like something to do with the integrated graphics or it's something on their end that I'm hoping gets patched. I've seen a lot of complaints about the DirectX 12 error but not really any solutions so far.
2 notes
·
View notes
Text
Upgrading Graphics Card for DirectX 12
If you've discovered that your current graphics card doesn't support DirectX 12, and you're eager to enjoy the enhanced gaming and multimedia experience it offers on Windows 11, it might be time to consider upgrading your graphics card. Here's a step-by-step guide to help you make the right choice and successfully upgrade your graphics card for DirectX 12 compatibility:
1. Check Your Current Graphics Card
First, you need to identify your current graphics card to understand why it doesn't support DirectX 12. Follow these steps:
Press Windows + R, type "dxdiag," and press Enter.
In the DirectX Diagnostic Tool, navigate to the "Display" tab.
You will see information about your current graphics card, including the manufacturer and model.
2. Research DirectX 12-Compatible Graphics Cards
Once you know your current graphics card, it's time to research and find a DirectX 12-compatible graphics card that suits your needs. Consider the following factors:
Budget: Determine how much you're willing to spend on a new graphics card. Prices can vary significantly, so set a budget that fits your financial situation.
Performance: Evaluate your gaming or multimedia requirements. Choose a graphics card that can handle the games and applications you intend to use. Check online benchmarks and reviews to assess performance.
Brand: Trusted brands like NVIDIA and AMD offer a wide range of graphics cards. Research their offerings and choose a reputable brand.
Compatibility: Ensure the graphics card you select is compatible with your computer's motherboard and power supply. Check the physical size (form factor) of the card to make sure it fits in your case.
3. Purchase the Graphics Card
Once you've chosen the right graphics card, proceed to purchase it. You can buy it from reputable retailers, both online and offline. Make sure to verify the card's compatibility one last time before making the purchase.
4. Prepare Your Computer
Before installing the new graphics card, follow these preparatory steps:
Back up your important data in case anything goes wrong during the installation.
Uninstall the existing graphics card drivers. Go to "Device Manager," expand "Display adapters," right-click your current card, and select "Uninstall device."
5. Install the New Graphics Card
Here's how to install the new graphics card:
Turn off your computer and disconnect it from the power source.
Open your computer case and locate the current graphics card.
Carefully remove the old card by detaching any power connectors and releasing any securing clips or screws.
Insert the new graphics card into the appropriate slot on your motherboard. Make sure it's firmly seated and securely attached.
Connect any necessary power cables from your power supply to the new card.
6. Install New Drivers
After physically installing the new graphics card, it's essential to install the appropriate drivers. You can usually find these drivers on the graphics card manufacturer's website. Download and install the latest drivers for your new card.
7. Test and Troubleshoot
Once the drivers are installed, power on your computer and check if the new graphics card is recognized. Run DirectX Diagnostic Tool again to confirm that DirectX 12 is now supported. If everything looks good, you're ready to enjoy the benefits of DirectX 12.
Conclusion
Upgrading your graphics card for DirectX 12 compatibility is a great way to enhance your Windows 11 experience. By following these steps, you can ensure a smooth transition to a graphics card that supports this advanced technology, unlocking better gaming performance and improved visuals for your favorite games and applications. Make an informed choice, and you'll be well on your way to maximizing your PC's capabilities.
0 notes
Text
New video card Rtx 3050 Eagle!
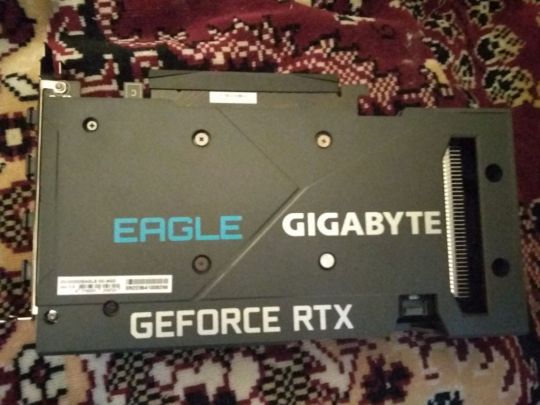
Hurrah! Hurrah! I have got a new video card. It is Gigabyte RTX 3050 8Gb Eagle OC version. Personally, for me, it is something incredible gaming event. I don’t play in modern games, for a long time. And moment X has come. Moment Nvidia, as I can say. Moment Rtx! Moment of truth! Saying in a one word.
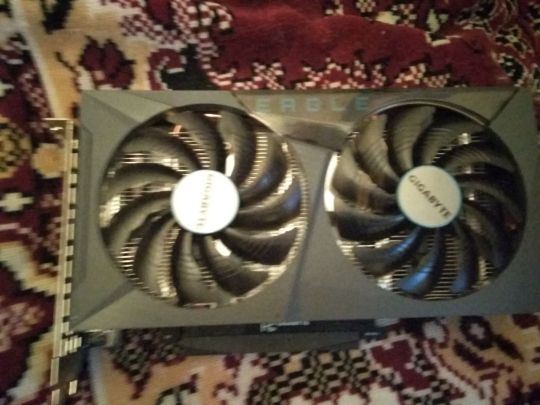
I set up a card. It goes well. I don’t play in modern games for a long time. Mainly, I am about retro theme. And about retro gaming. Card is in a massive case. It looks cool! Version Eagle, cool!
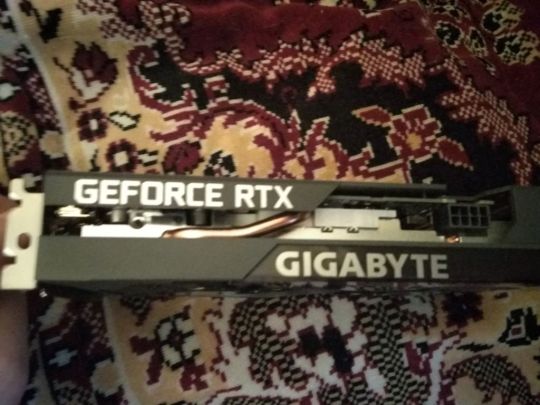
8Gb of video memory type GDdr6. I have never seen so lots of memory in my life. As I think, at the built-in card it was 1 gb or 2 gb. Card has a Dlss technology support. Ray Tracing. Support for Direct X 12 Ultimate. OpenGl 4.6. I tell what is it written at the box.
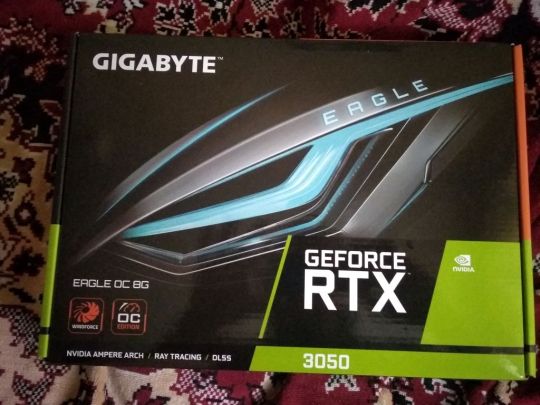
And for the first time I try out soft Nvidia. Nvidia experience. Nvidia Shadowplay. It can give ability to capture a game screen and record video. Very comfortable thing. I am glad to have this card!
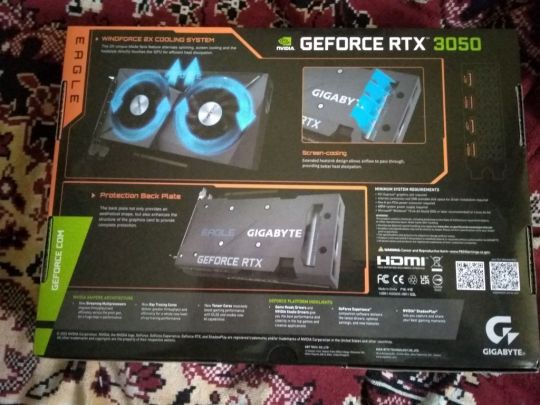
But, saying the truth, as I get it out, I don’t have at my computer anything modern games to test a card. And I need to wait for steam sales. I take something. I run to the sales of Warhammer games. I take Warhammer 40 000 Inquisitor Martyr. So, I take several games.
And it has a size. 80 gb! Graphics is beautiful, I play it for a little time! So, I can say it is a first game on a modern system. And I saw I little game Illwil. Looks cool. It looks like it is action game. With horror moments. And walk and shoot. I am interested in it. I take also Warhammer Vermintide 1 and Panzer Dragoon Remake.
So, I will start to play a modern games!
Dima Link is making retro videogames, apps, a little of music, and some retro more.
WEBSITE: http://www.dimalink.tv-games.ru/home_eng.html BLOGGER: https://dimalinkeng.blogspot.com/ DISCORD: https://discord.com/invite/F24Kw7TaH4
#videogames#modern games#modern gaming#gamer#pc update#pc upgrade#videocard#8gb video memmory#gddr6#directx 12#rtx 3050#nvidia#nvidia shadowplay#nvidia expirience#gigabyte#warhammer#40000#games
1 note
·
View note
Text
I've been messing around with the computer all morning trying to get the Inzoi demo to work...
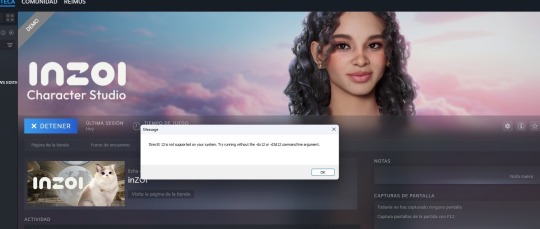
#having an almost 8 year computer has it’s downfalls#i also have a MacBook but it is for university stuff so i don’t want to mess around with it#DirectX 12 this is the war#inzoi#inzoi demo
2 notes
·
View notes
Text
i miss warframe man when the fuck am i getting that mini sd card WHY am i nintendo switch warframe player.......................................................
#why did i do this to myself?#(because when i got my switch my old laptop doesnt let me play warframe)#(even tho)#(I FUCKING HAVE DIRECTX 12)#BUT MY LAPTOP SAID FUCK YOU ANAKIN#so now i must suffer as a switch player :CRYINGWAILINGWHY:#ani.wav
3 notes
·
View notes
Text
marvel rivals when i get you. when i get you marvel rivals (negative)
#fucking game needs the highest graphics specs known to man#fuck me i guess. throws my laptop at a wall#“directx 12 not supported” your fucking life is about to be not supported
0 notes
Text
Graphics Processing GeForce RTX™ 3050 Core Clock - 1860 MHz (Reference Card: 1777 MHz) CUDA® Cores - 2560 Memory Clock - 14000 MHz Memory Size - 8 GB
0 notes
Text

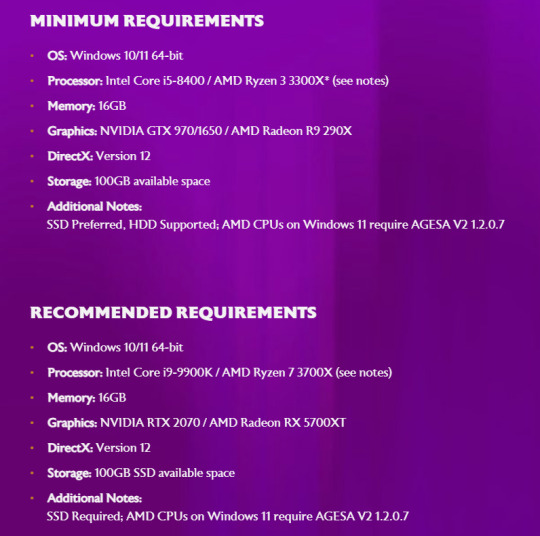
Dragon Age: The Veilguard PC requirements -
"Minimum Requirements - OS: Windows 10/11 64-bit - Processor: Intel Core i5-8400 / AMD Ryzen 3 3300X* (see notes) - Memory: 16GB - Graphics: NVIDIA GTX 970/1650 / AMD Radeon R9 290X - DirectX: Version 12 - Storage: 100GB available space - Additional Notes: SSD Preferred, HDD Supported; AMD CPUs on Windows 11 require AGESA V2 1.2.0.7 --- Recommended Requirements - OS: Windows 10/11 64-bit - Processor: Intel Core i9-9900K / AMD Ryzen 7 3700X (see notes) - Memory: 16GB - Graphics: NVIDIA RTX 2070 / AMD Radeon RX 5700XT - DirectX: Version 12 - Storage: 100GB SSD available space - Additional Notes: SSD Required; AMD CPUs on Windows 11 require AGESA V2 1.2.0.7"
[source]
#dragon age: the veilguard#dragon age: dreadwolf#dragon age 4#the dread wolf rises#da4#dragon age#bioware#video games#long post#longpost#mj best of
1K notes
·
View notes
Text
I’m so glad games that require DirectX always install it. I mean, why would it still be installed from every other game that requires it?
And, it’s only 2023, why would I have such an advanced version of DirectX as version 9?
#i just had to wait for directx 9 to install in the year 2023#i'm annoyed#I HAVE AT LEAST 11 FFS IF NOT 12
0 notes
Text
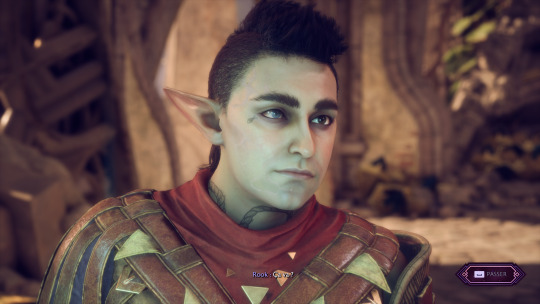
For those playing DA:TV on PC and who'd like to easily take pics during cutscenes and all, can confirm that ReShade works fine!
Path to your "Dragon Age The Veilguard.exe" file and select DirectX 12 during the installation 👌
have a random spoiler-free Rook pic as proof :3
20 notes
·
View notes
Text
youtube
I just like hearing Modern Vintage Gamer talk about technical things I don't understand lol but this video reminded me of the state of TS2
He says "For the longest time, trying to get Diablo to run on modern PCs is almost impossible. There were some third party patches & hacks you could use with some varying levels of success, but for years it was difficult to run the game unless you had access to an old Windows 95 computer."
"...It wasn't until recently, when GOG released Diablo 1 & 2 for modern machines [in 2019]. The GOG version patches routines in the executable, graphics, and sound APIs to allow you to play the game on your modern PC."
"Since Blizzard has all but abandoned the game, there is no simple way of running it on anything other than a Windows PC. ...One possible way to bring the game forward is to reverse engineer the game."
Then he goes on to explain how that's accomplished by sifting through the data files for leftovers & debug info that hint at how the game's code functions. Even though Diablo had a lot of that, it took someone over 1,000 hours to do the reverse engineering.
But after the source code was reverse engineered, people were able to fix the game so that it could work better on modern PCs. Basically doing what GOG did with their re-release, but making it open source so people who already owned the game on CD could get the same benefit.
Diablo's minimum requirement is a 60 MHz processor, and a DirectX 3 compatible graphics card.
TS2's minimum requirement is a 800 MHz processor & a DirectX 9 compatible graphics card.
Then there's my current PC, with a 3.4 GHz processer, and DirectX 12.
idk just something I've been thinking about, not just so I can keep playing my 20-year-old games but also if the developers refuse to support their games as the passage of time makes them less accessible, how are we going to preserve them.
23 notes
·
View notes
Text
Tenno,
With the arrival of Whispers in the Walls on December 13th, we would like to help prepare you for the Update with some rough update sizes on each platform:
PC DirectX 11: 2.82 GB PC DirectX 12: 4.18 GB* PlayStation 4: 3.54 GB PlayStation 5: 8.77 GB Xbox: 3.6 GB Nintendo Switch: 16.45 GB**
*Our PC Tenno running on DirectX 12 will notice a larger download due to all new optimized DirectX 12 shaders.
**This update includes a remaster for our Nintendo Switch Tenno! A remaster typically involves file optimization that helps reduce the overall size of the game on a particular platform.
The download size for Whispers in the Walls will be larger than usual (16.45 GB), since it includes the update content as well as the remaster (requires every file in the game to be redownloaded). However, once the download completes, the total size of Warframe on the Nintendo Switch will be reduced by 2 GB!
Whispers in the Walls will bring Warframe over the base memory allowance on Switch, so if you do not play using an SD card, we recommend you uninstall Warframe and reinstall it, as it will allow your Switch more space to operate while updating and will likely update faster this way.
We appreciate your understanding with needing to redownload the game, and hope you enjoy the extra space on your Switch!
Explore Albrecht’s Laboratories tomorrow!
61 notes
·
View notes
Text

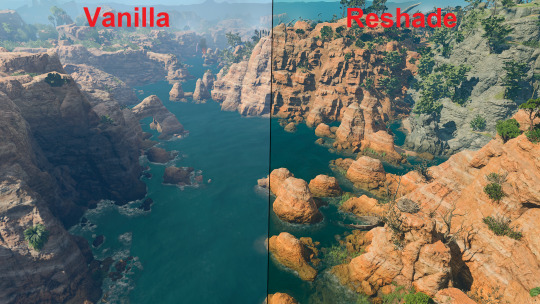


Another reshade from yours truely. You will need to install reshade for the effect to work. Pretty easy if you follow the promts and install directx 10/11/12 and install all effect packages.
Download here
Reshade install guide here and if you have any questions or need help you can shoot me a message or my discord!
57 notes
·
View notes
Note
Found your work. You inspired me to take another shot at technical art and graphics programming. Do you recommend any specific resources for getting started and beyond?
Thanks so much! Really glad I could inspire you to do that bc graphics and tech art things are so much fun :D
(Also sorry for the late response. I've been a bit busy and was also thinking about how I wanted to format this)
I'm mostly self taught with a lot of stuff and have done lots of research on a per-project basis, but Acerola and Freya Holmer are two of my favorite channels for learning graphics or technical art things. Shadertoy is also an amazing resource to not only create and view other's shaders, but learn about algorithms and see how people do things!
While I don't have many general resources. I'll steal these resources for graphics programming that Acerola shared in his discord server:
For getting started with graphics engine development: DX11: https://www.rastertek.com/tutdx11s3.html OpenGL: https://learnopengl.com/ DX12: https://learn.microsoft.com/en-us/windows/win32/direct3d12/directx-12-programming-guide Vulkan: https://vulkan-tutorial.com/
For getting started with shaders: catlikecoding: https://catlikecoding.com/unity/tutorials/rendering/ the book of shaders: https://thebookofshaders.com/ daniel ilett's image effects series: https://danielilett.com/2019-04-24-tut1-intro-smo/
For getting started with compute shaders: Kyle Halladay: http://kylehalladay.com/blog/tutorial/2014/06/27/Compute-Shaders-Are-Nifty.html Ronja: https://www.ronja-tutorials.com/post/050-compute-shader/ Three Eyed Games (this one teaches ray tracing AND compute shaders, what a bargain!): http://three-eyed-games.com/2018/05/03/gpu-ray-tracing-in-unity-part-1/
I also wanted to talk a little bit about I do research for projects!
A lot of my proficiency in shaders just comes from practice and slowly building a better understanding of how to best utilize the tools at my disposal, almost like each project is solving a puzzle and I want to find the most optimal solution I can come up with.
This is definitely easier said than done and while a lot of my proficiency comes from just doodling around with projects and practicing, I understand that "just practice more lol" is a boring and kinda unhelpful answer. When it comes to projects like my lighting engine, I came up with a lot of the algorithm stuff myself, but there were certainly lots of details that I learned about from past projects and research like ray marching (calculating the ray intersection of a distance function) and I learned about the jump flood algorithm from a tech artist friend (calculating distance functions from textures)
Each new algorithm you learn in various projects ends up being another tool in your toolbox, and each project becomes a combination of researching new tools and applying the tools you've learned in the past.
One last example. I made a Chladni plate simulation in blender (that thing where you put sand on a metal plate and play noises and it makes patterns) and it started with me researching and looking up chladni plates, I watched youtube videos related to why the sand forms the patterns it does, which ended up being due to how the sound waves displaced the plane. I googled some more and found the actual equation that represents it, and used it to simulate particle motion.
Figure out some projects you want to do and just do some googling or ask for help in game dev discord servers or whatever. Lot's of research on a per-project basis is honestly how you'll learn the most imo :3
39 notes
·
View notes
Text
"A Parade of Providence" Version 3.6 Update Maintenance Preview

Dear Travelers,
Our developers will soon begin performing update maintenance. While the update maintenance is in progress, Travelers will be unable to log in to the game. Please take note of the update time and schedule your game time accordingly.
After this is complete, the game will update to a new version. We recommend that Travelers install this update over a Wi-Fi connection.
〓Update Schedule〓
Update maintenance begins 2023/04/12 06:00 (UTC+8) and is estimated to take 5 hours.
〓How to Update Game Client〓
PC: Close the game, open the Genshin Impact Launcher, and click Update.
iOS: Open the App Store and tap Update.
Android: Open the game and follow the directions on-screen.
PS5™ and PS4™: Highlight Genshin Impact from the Home Screen, press the OPTIONS button and select "Check for Update."
Please do not hesitate to contact Customer Service if you encounter any issues installing the new version. We will do our very best to resolve the issue.
〓Compensation Details〓
Maintenance Compensation: Primogems ×300 (60 Primogems per hour the servers are down)
〓Scope of Compensation〓
Maintenance Compensation: Travelers who reach Adventure Rank 5 or above before 2023/04/12 06:00 (UTC+8).
Please claim before the end of Version 3.6.
Our developers will distribute compensation to Travelers via in-game mail within 5 hours after the update maintenance is finished. The mail will expire after 30 days, so don't forget to claim the attached compensation in time.
For more update details, including bug fixes and other compensation details, please see the Version Update Details notice to be posted at 2023/04/12 07:00 (UTC+8).
〓Update Content Overview〓
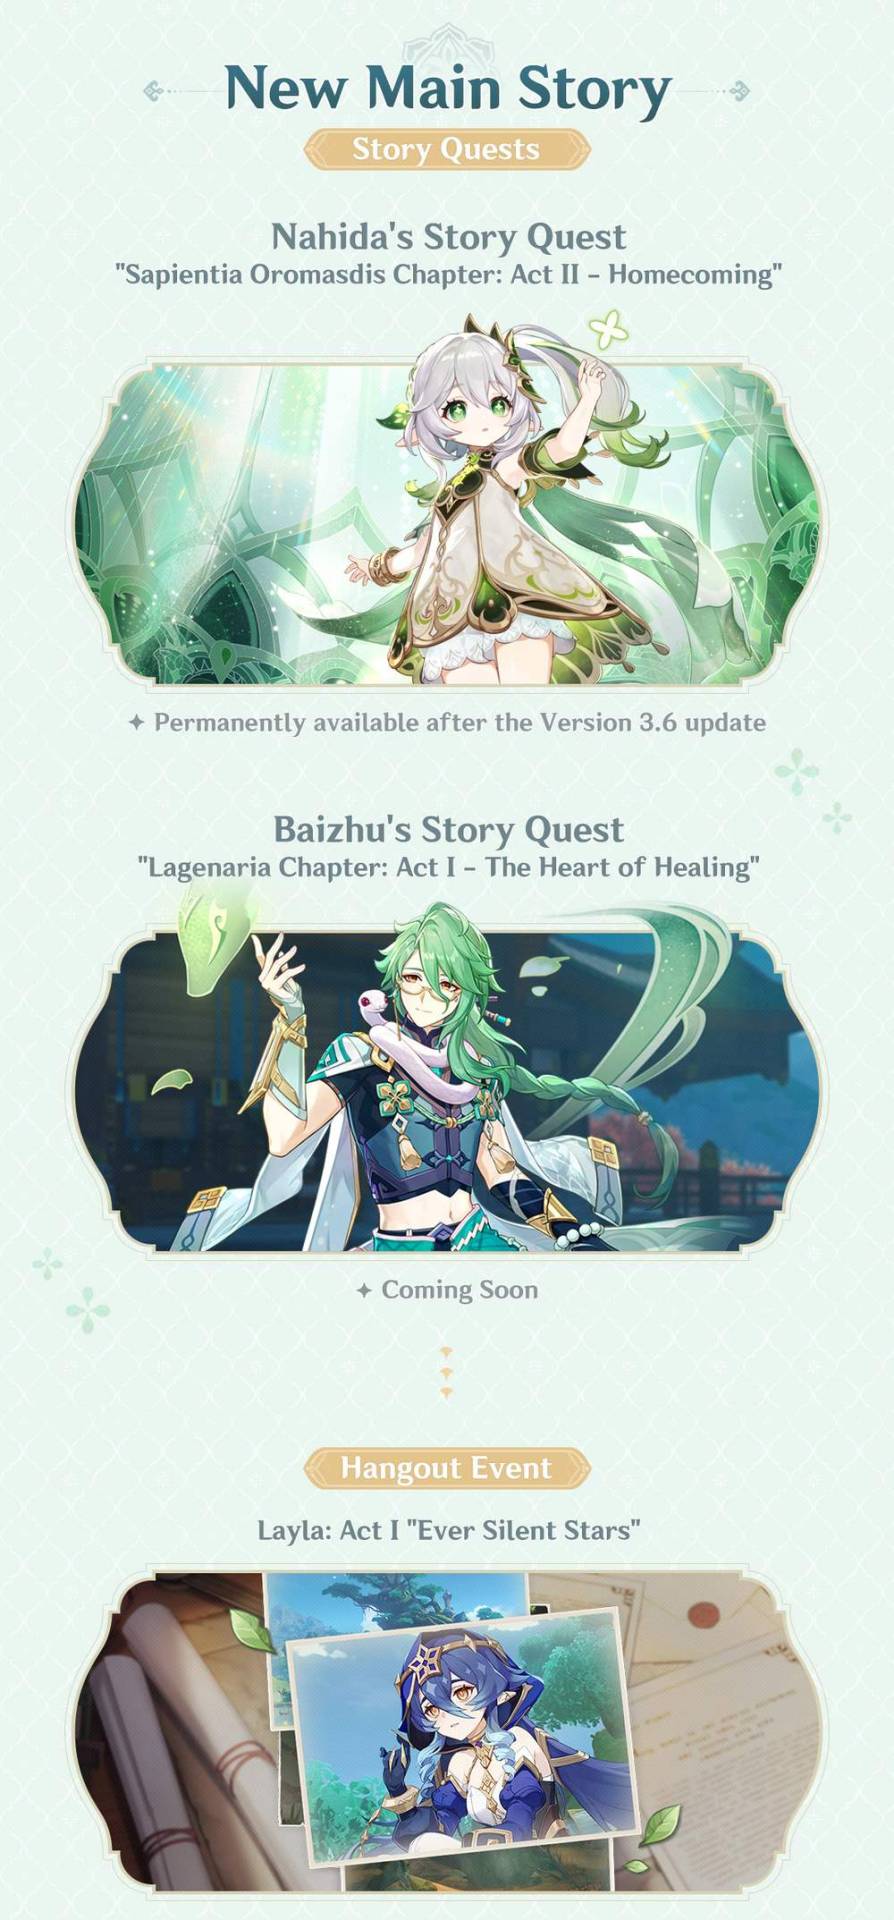

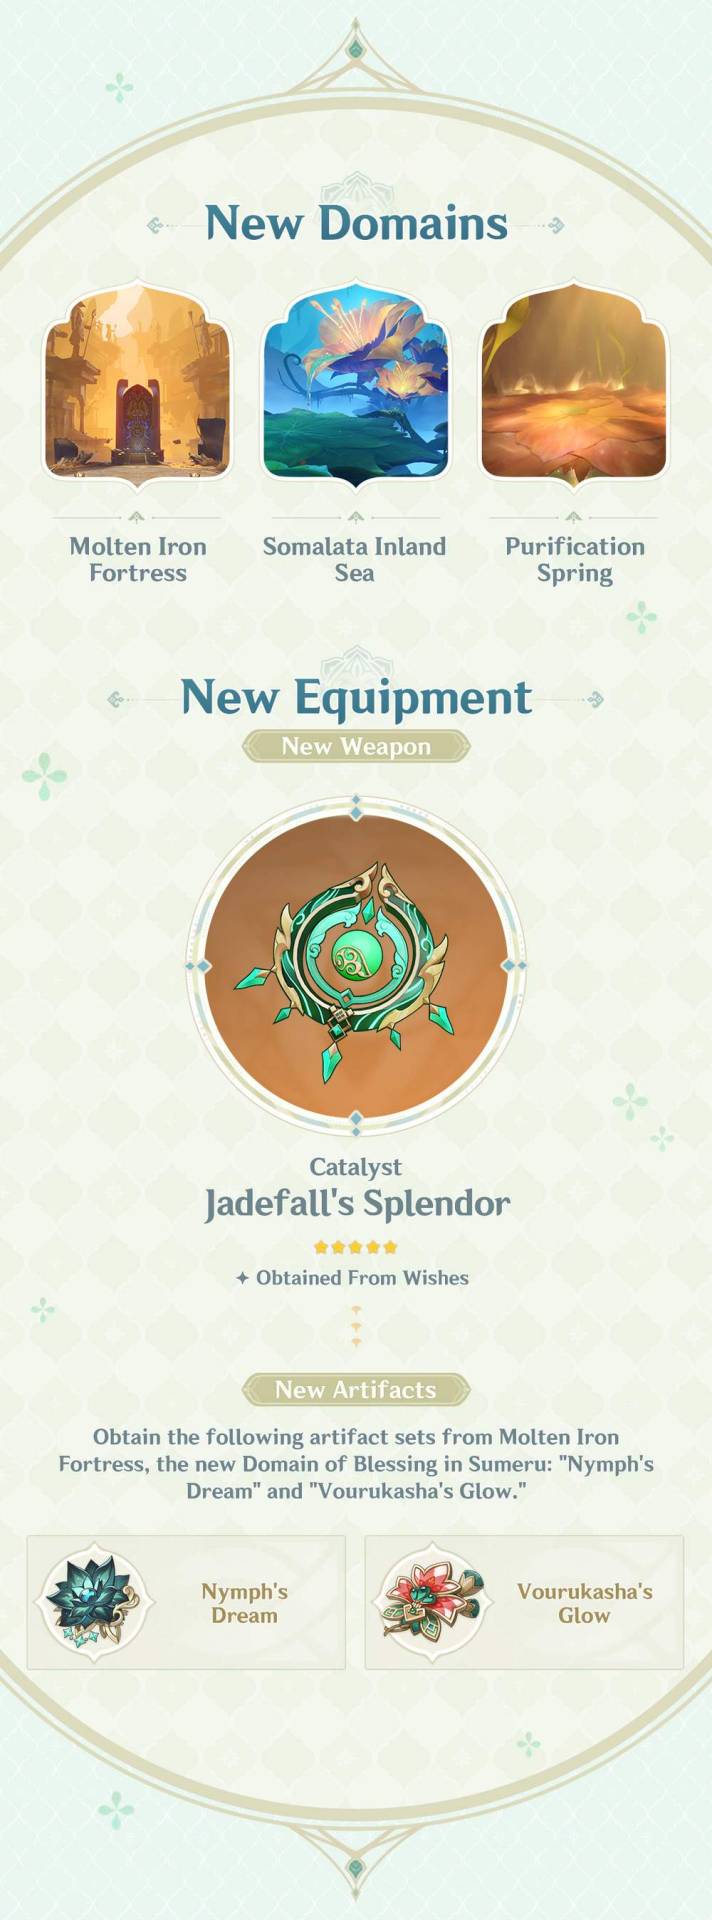
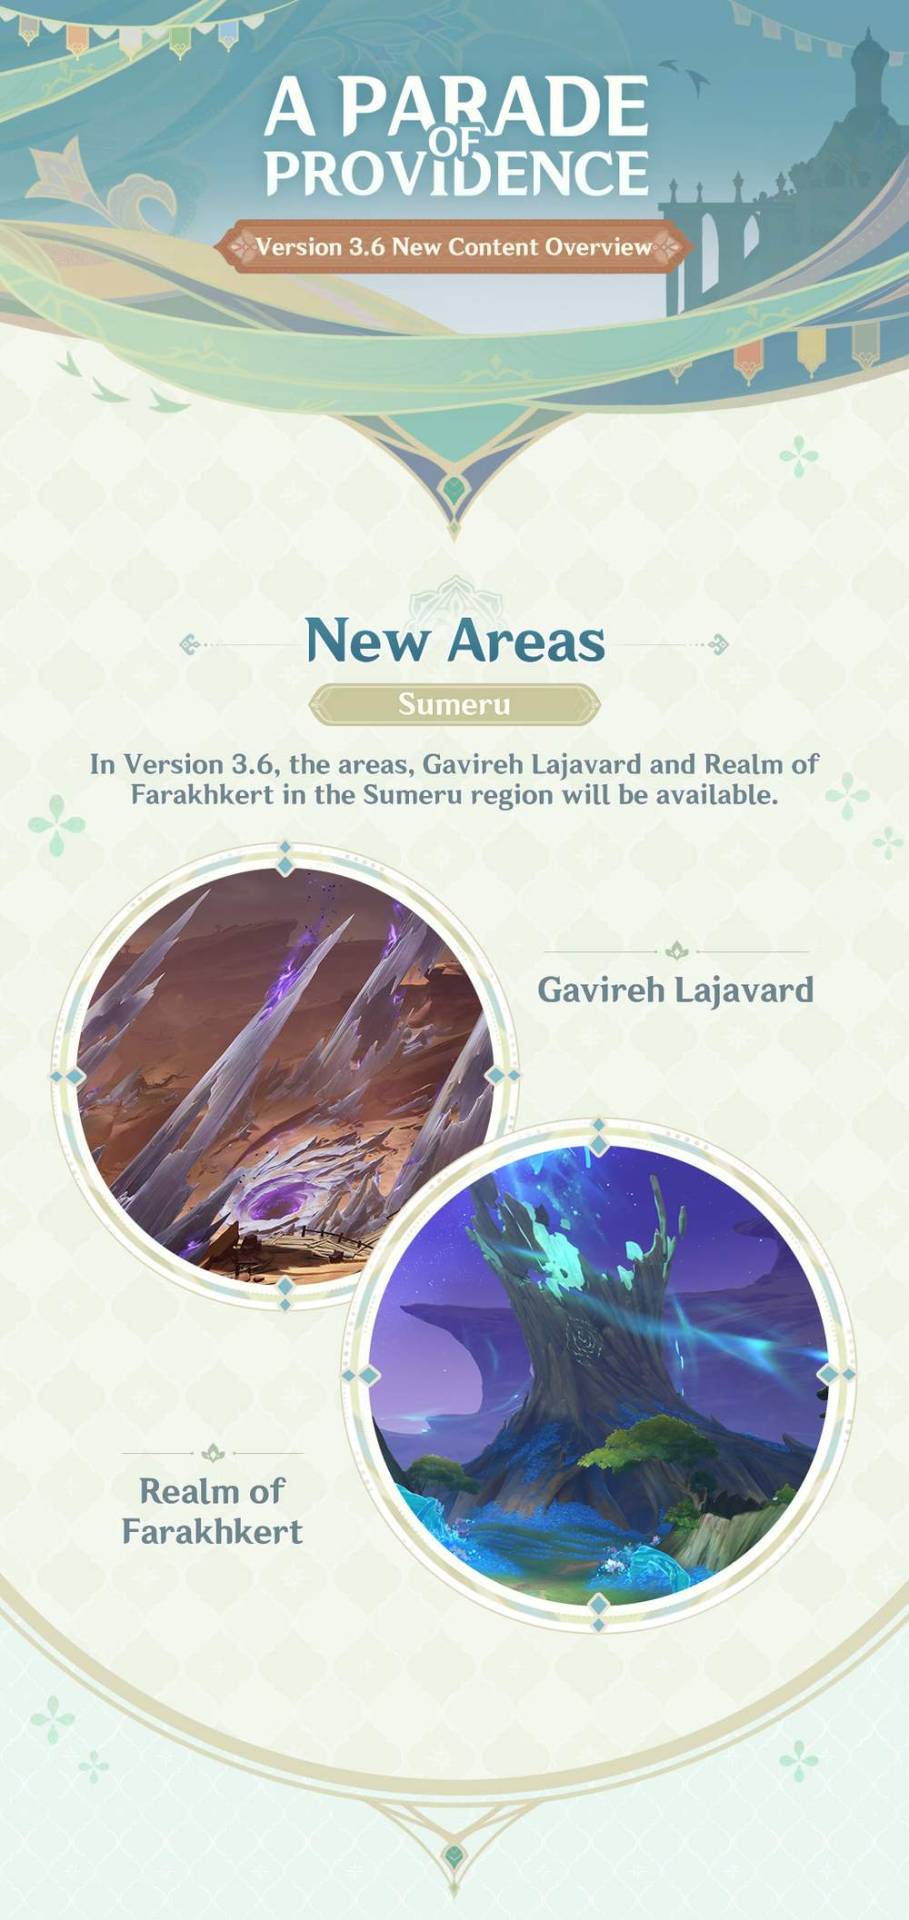

After the Version 3.6 update, iOS-supported devices will be updated.
〓Minimum Specifications and Recommended Specifications〓
▌Android:
● Supported Devices
Must be compatible with:
ARMv8-A 64-bit architecture
Non-PowerVR architecture GPU
RAM: 4 GB or more
Operating System: Android 8.0 and above
Storage Space: 30 GB of available storage space
● Recommended Specifications
CPU: Qualcomm Snapdragon 845, Kirin 820, or above
RAM: 6 GB or more
Storage Space: 30 GB of available storage space
▌iOS:
iPhone 8 Plus
iPhone X
iPhone XS
iPhone XS Max
iPhone XR
iPhone 11
iPhone 11 Pro
iPhone 11 Pro Max
iPhone SE (2nd generation)
iPhone 12
iPhone 12 mini
iPhone 12 Pro
iPhone 12 Pro Max
iPhone 13
iPhone 13 mini
iPhone 13 Pro
iPhone 13 Pro Max
iPhone 14
iPhone 14 Plus
iPhone 14 Pro
iPhone 14 Pro Max
iPad Air (3rd generation)
iPad mini (5th generation)
iPad Pro, 10.5-inch
iPad Pro, 12.9-inch (2nd generation)
iPad Pro, 11-inch (1st generation)
iPad Pro, 12.9-inch (3rd generation)
iPad Pro, 11-inch (2nd generation)
iPad Pro, 12.9-inch (4th generation)
iPad Pro, 11-inch (3rd generation)
iPad Pro, 12.9-inch (5th generation)
iPad Pro, 11-inch (4th generation)
iPad Pro, 12.9-inch (6th generation)
iPad Air (4th generation)
iPad (8th generation)
iPad mini(6th generation)
iPad (9th generation)
iPad Air (5th generation)
iPhone SE (3rd generation)
iPad (10th generation)
Storage Space: 20 GB of available storage space
Supported Operating System: iOS 11.0 or above
(Bluetooth controller support requires iOS 14 or above)
▌PC:
● Minimum Specifications
Operating System: Windows 7 SP1 64-bit, Windows 8.1 64-bit, or Windows 10 64-bit
Processor: Intel Core i5 or equivalent
RAM: 8 GB
Graphics Card: NVIDIA® GeForce® GT 1030 or better
DirectX Version: 11
Storage Space: 50 GB of available storage space
● Recommended Specifications
Operating system: Windows 7 SP1 64-bit, Windows 8.1 64-bit, or Windows 10 64-bit
Processor: Intel Core i7 or equivalent
RAM: 16 GB
Graphics Card: NVIDIA® GeForce® GTX 1060 6 GB or better
DirectX Version: 11
Storage Space: 50 GB of available storage space
If your device specifications are too low, the game may fail to install, fail to start, display black screens, experience freezing, or demonstrate other technical issues.
〓Adjustments & Optimizations〓
● Genius Invokation TCG
Adjusts the description of Combat Status "Sparks 'n' Splash" generated by Character Card "Klee" in Genius Invokation TCG.
The original description was: "After your character uses a Skill: Deal 2 Pyro DMG to your active character. Usages: 2."
The adjusted description is: "After a character to which Sparks 'n' Splash is attached uses a Skill: Deals 2 Pyro DMG to their team's active character. Usages: 2."
Adjusts the description of Talent Card "Sin of Pride" in Genius Invokation TCG.
The original description was: "If a friendly Electro character has Crowfeather Cover attached, their Elemental Skill and Elemental Burst deal +1 additional DMG."
The adjusted description is: "When Kujou Sara is active and has this card equipped, all allied Electro characters with Crowfeather Cover will deal +1 additional Elemental Skill and Elemental Burst DMG."
Adjusts the number of Elemental Dice required for the Event Card "Katheryne" in Genius Invokation TCG: the required dice has been reduced from 2 Elemental Dice of your choice to 1.
Adjusts the effect of the Elemental Burst "Nereid's Ascension" generated by Character Card "Sangonomiya Kokomi" in Genius Invokation TCG.
The original effect was: "Deals 3 Hydro DMG. This character gains Ceremonial Garment."
The adjusted effect is: "Deals 2 Hydro DMG. Heals all allied characters for 1 point. This character gains Ceremonial Garment."
Adjusts damage dealt by the Combat Status "Rainbow Bladework" generated by Character Card "Xingqiu" in Genius Invokation TCG: "Deal 2 Hydro DMG" is now adjusted to "Deal 1 Hydro DMG."
Adjusts the number of Elemental Dice required for the Equipment Cards "Blizzard Strayer," "Heart of Depth," "Crimson Witch of Flames," "Thundering Fury," "Viridescent Venerer, "Archaic Petra," and "Deepwood Memories" in Genius Invokation TCG: the required dice is now adjusted from 3 Elemental Dice of the same Elemental Type to 3 Elemental Dice of your choice.
Optimizes some of the icons in Genius Invokation TCG.
When Travelers claim rewards through the Genius Invokation TCG Player Level or TCG Player's Manual, they can still claim rewards despite said rewards exceeding the cap. The rewards will be sent to the Inventory directly.
After the cards in the Card Shop are sold out, if there are other ways to obtain the card, it will be displayed on the Card Details interface.
You will receive 1 Proficiency point after completing a Guest Challenge in Genius Invokation TCG of each week for the first time. (You will not receive Proficiency points for repeated Guest Challenge victories prior to this update.)
Removes the margin restrictions to the left and right sides of the gaming interface when players play Genius Invokation TCG on mobile devices.
Improves relevant Genius Invokation TCG controller operations:
During the Roll Phase, players can now hold the selection button and push the left joystick to select multiple dice.
The button to end the turn will also be displayed even without hovering the cursor.
You can now switch between your Hand and Character Skills by pushing the joystick.
● Audio
After Version 3.6 is updated, the character "Verdant Strider" Tighnari (Dendro)'s VA will be updated.
Optimizes the English and Korean voice-overs of some characters, and fixes issues whereby the Chinese voice lines failed to play normally in Profile > Voice-Over.
Optimizes the Korean, English, and Japanese voice lines for some quests, and fixes inconsistencies between the Chinese voice-overs and text for certain quests.
Optimizes the English and Japanese voice-overs for certain items and creatures.
● System
Adjusts the avatar images of some enemies.
Removes the restrictions on the addition and moving of some Furnishings for the placement of Custom Furnishing Sets in the Serenitea Pot.
The camera function in the Paimon Menu can no longer be used when the character is diving.
*This is a work of fiction and is not related to any actual people, events, groups, or organizations.
"PlayStation", "PS5", "PS4", "DualSense", "DUALSHOCK" are registered trademarks or trademarks of Sony Interactive Entertainment Inc.
#genshin impact#genshin impact updates#official#genshin impact news#genshin impact 3.6#lots going on here#they're finally replacing tighnari's va though!!
103 notes
·
View notes
Note
Hiii, I've been loving the look on your recent posts! I was wondering how to get/use relight, if it's not a bother?
- 🌻🌌
hi! thank you so much :) to answer your question, you can only retrieve relight through Pascal Glicher's discord server... but here's the sitch.
to get access to the discord server, you have to subscribe to their 'path tracers' tier on patreon (which is $9). once you're subscribed, you'll be prompted to connect your discord account with patreon which then you'll be given access to the discord server.
the name of the server should be PGHub. after you've gotten access, you'll be prompted to pick your roles, unless they're chosen for you automatically. in the channels section, click 'downloads level 2'. there you'll see the download file for relight! the folder should be named 'immerse ultimate'. once you've downloaded the folder, unzip it, and place the files in their corresponding reshade/gshade folder. you can watch this tutorial to figure out how to download relight <3
now i use reshade, but when it comes to downloading the files, the steps are pretty much the same. the only problem is relight and it's neccessary effects are not supported on dx9 (found this out the hard way). if you use reshade, open your application and check if your reshade was downloaded with dx9 or dx11. whichever setting is most compatible with your gpu, reshade will automatically select for you.
if your reshade was downloaded with dx9, you can update to dx11. BUT, and this is IMPORTANT: in order for reshade dx11 to work, you MUST turn off the 'open with dx9' setting in the sims 4. if you do not do this, reshade will NOT WORK. to do this, launch the game, go to options > game options > graphics and uncheck the dx9 box. if it's not checked, then you can skip this step. go back to reshade, select your application (as if you were installing reshade into your game again), click next > directx 10/11/12 > next > update reshade only.
you can now launch your game. once the game launched, open the reshade overlay with whatever hotkey is assigned, mine is 'home'. once reshade is opened, type 'relight' in the search box and check the box to toggle the effect. i suggest testing out relight in live mode, if you toggle relight at the startup, you won't see anything.
since i am a begginer, and i'm still learning how to properly use relight, i cannot give an in depth tutorial. you can read this one here on how to use relight for reshade, or you can view the complete guide for the updated relight here.
thank you for your ask! <3
-ana
2 notes
·
View notes